

What are accounts?
An application’s Accounts tab shows you a list of all the accounts inside the application, the status of each account, its type (user, service, or system), the account owner, and the roles the account has in the app.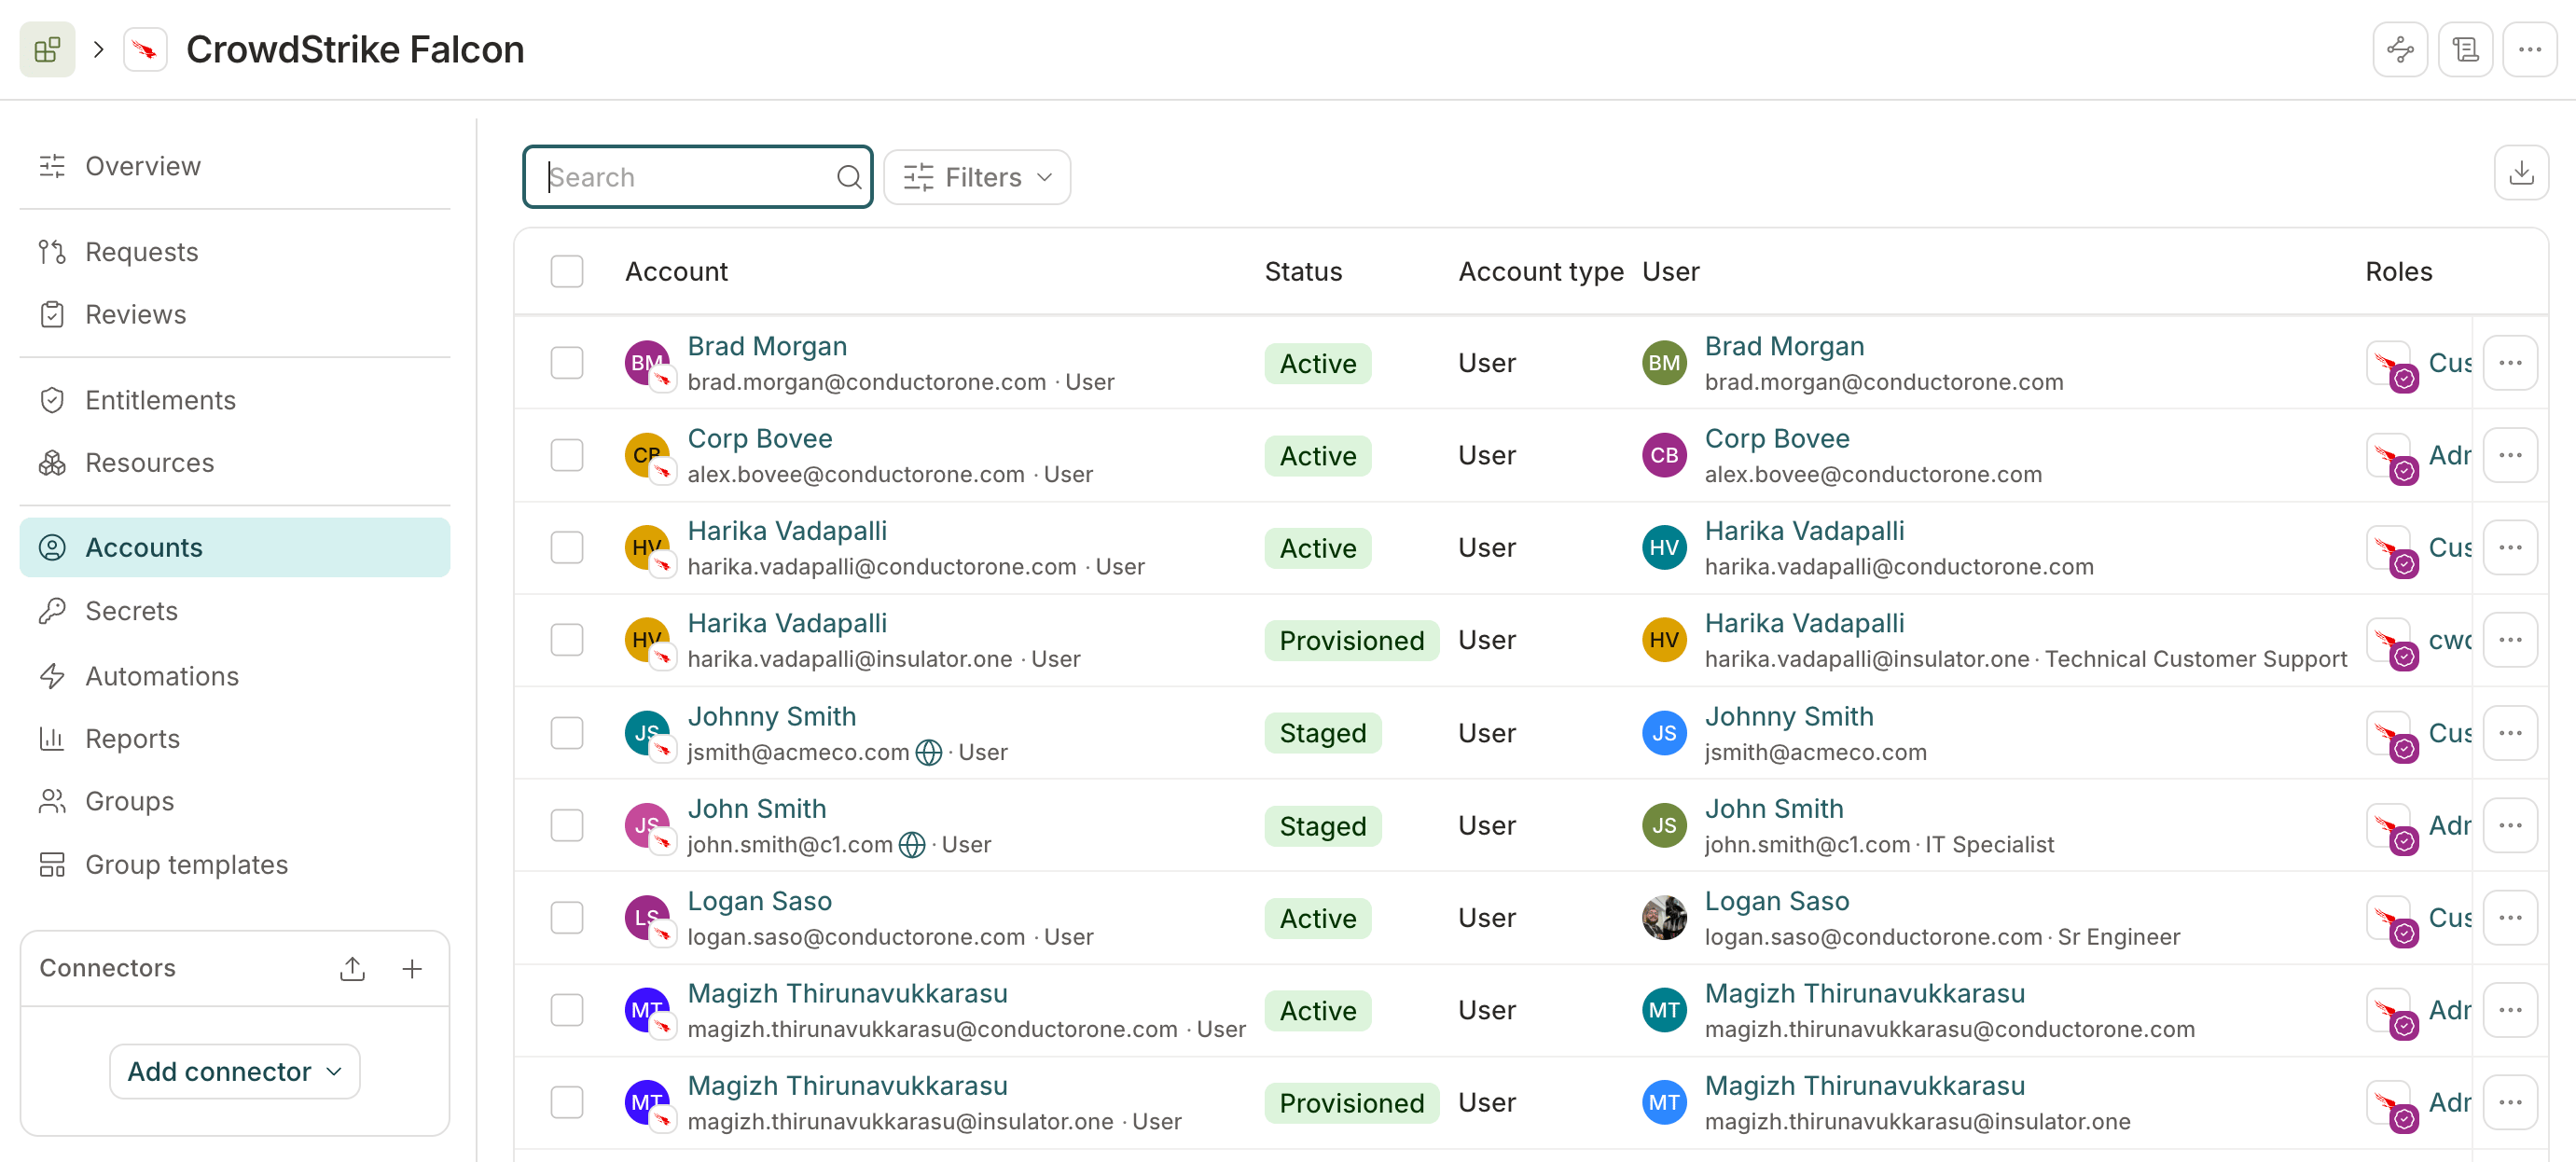
Account owners
When app accounts are ingested, C1 automatically attempts to match them to C1 users (the humans in your organization). These mappings are shown in the Account owner column.Auto-match accounts with users
By default, C1 uses email accounts and usernames to match accounts to users. This is called Narrow mapping. If users and accounts aren’t matching automatically when using narrow mappings, you can switch to Broad mapping (which also attempts to match first and last names) or Custom mapping (which lets you define your own ordered match rules). To change the mapping level:1
Navigate to an application.
2
In the upper right corner of the page, click the … (more actions) menu and select Settings.
3
Select the type of mapping you want to use:
- Narrow: (Default) Accounts are mapped using email addresses and usernames.
- Broad: Accounts are first mapped using email addresses and usernames, but if these cannot be found or matched, accounts are then mapped using the user’s first and last name.
- Custom: Accounts are mapped using an ordered list of rules that you define. Each rule defines a pair of key expressions to extract matching keys from application accounts and C1 users. Rules are evaluated in order, and C1 uses the first rule that produces a match. The default rules match the narrow mapping behavior, which you can then add to, reorder, or replace.
4
Click Save.
Manually set account owners
If automatic matching can’t be performed, or if some minor clean-up is required, you can set an account owner manually:1
Navigate to an application and click Accounts.
2
Find the account that needs an account owner change and click the … (more actions) menu.
3
Select Set account owner.
4
Choose the correct C1 user from the dropdown and click Set account owner.
Set account owners in bulk
To set or update account owners for multiple accounts at once:1
Navigate to an application and click Accounts.
2
Use the checkboxes to select the accounts that need an account owner change.
3
From the bulk actions menu at the bottom of the screen, select Set account owner.
4
Choose the correct C1 user from the dropdown and click Set account owner.
Set account types
Accounts are set to User by default. Use the Account type control to designate service accounts and system accounts, which can then be included in or excluded from your access review campaigns as needed.The account type you set here is the source of the
account.app_user_type value (AppUserType.USER, AppUserType.SERVICE_ACCOUNT, or AppUserType.SYSTEM_ACCOUNT) used in CEL expressions. C1 does not infer account type from the source app — you (or an automation) must tag the account in C1 for those expressions to match. The related subject.type value on a C1 user (such as UserType.HUMAN, UserType.SERVICE, or UserType.SYSTEM) is derived from the account types of the accounts linked to the user.1
Navigate to an application and click Accounts.
2
Find the account that needs an account owner change and click the … (more actions) menu.
3
Select Set account type.
4
Choose Service account or System account and click Update account type.
Customize columns and export to CSV
Use Configure columns in the Accounts table header to adjust which columns are visible — toggle columns on or off and drag to reorder. Your layout is saved automatically. To export accounts data to CSV, click Generate CSV above the Accounts table. The Download to CSV drawer opens where you can choose which columns to include before generating the file.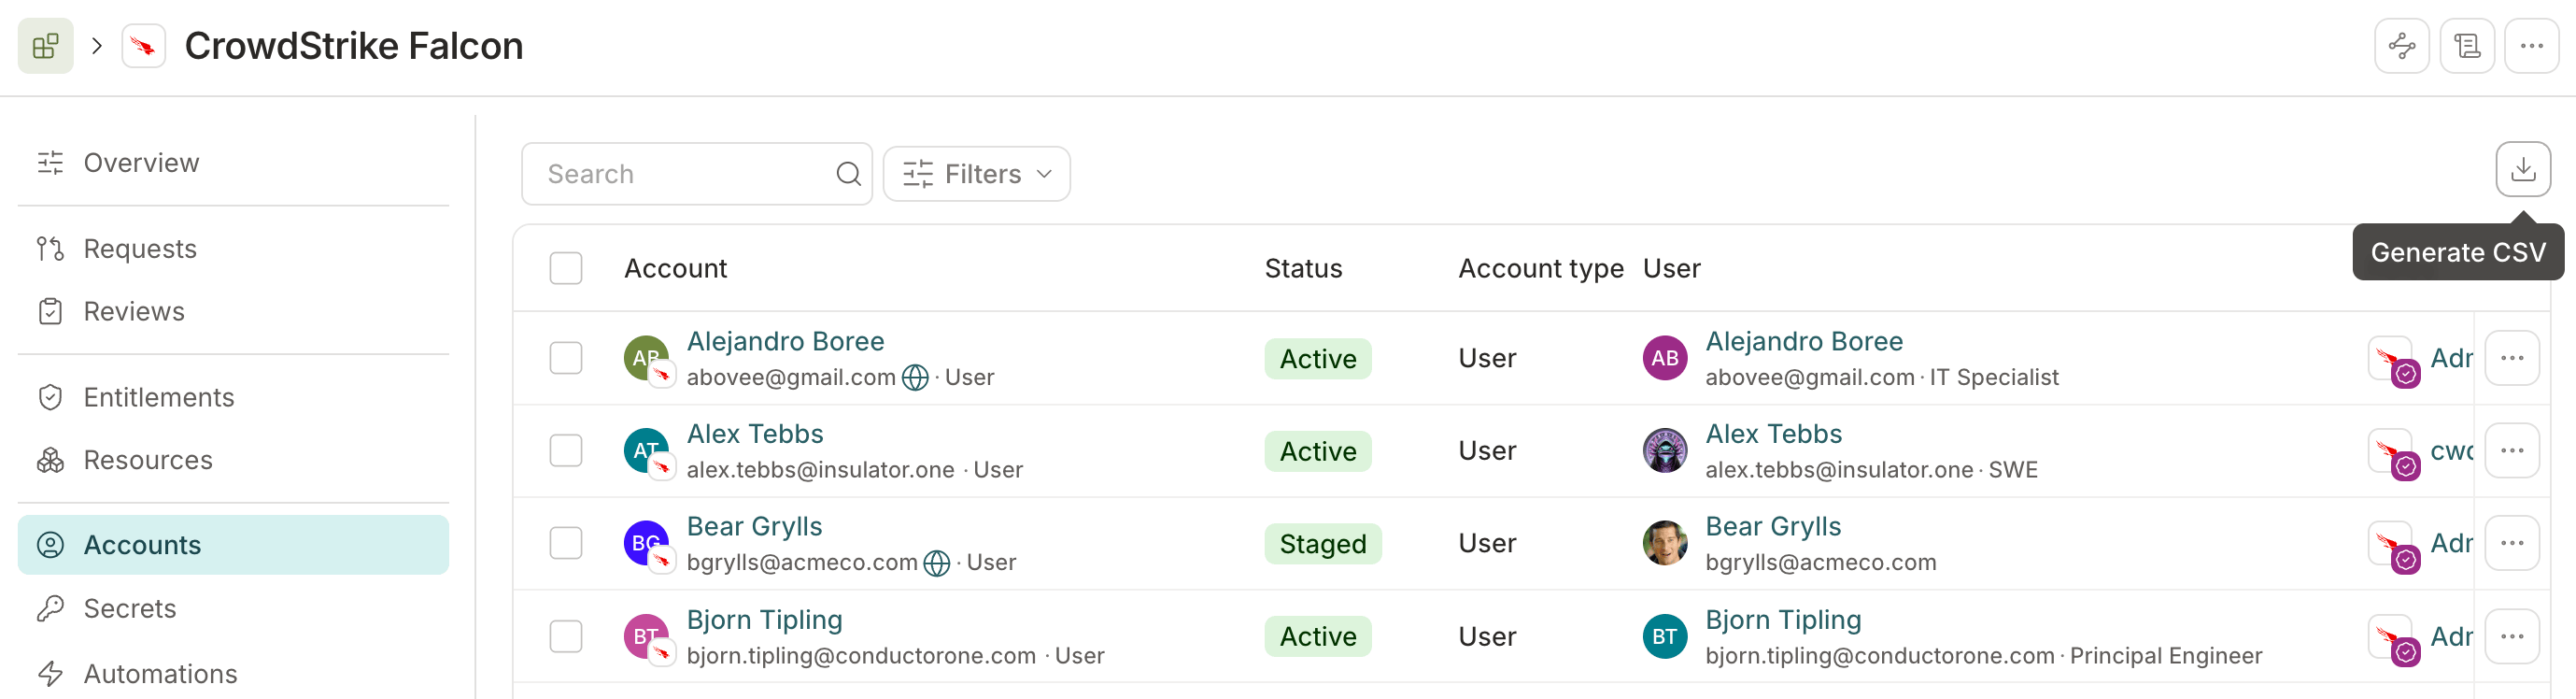
Account details
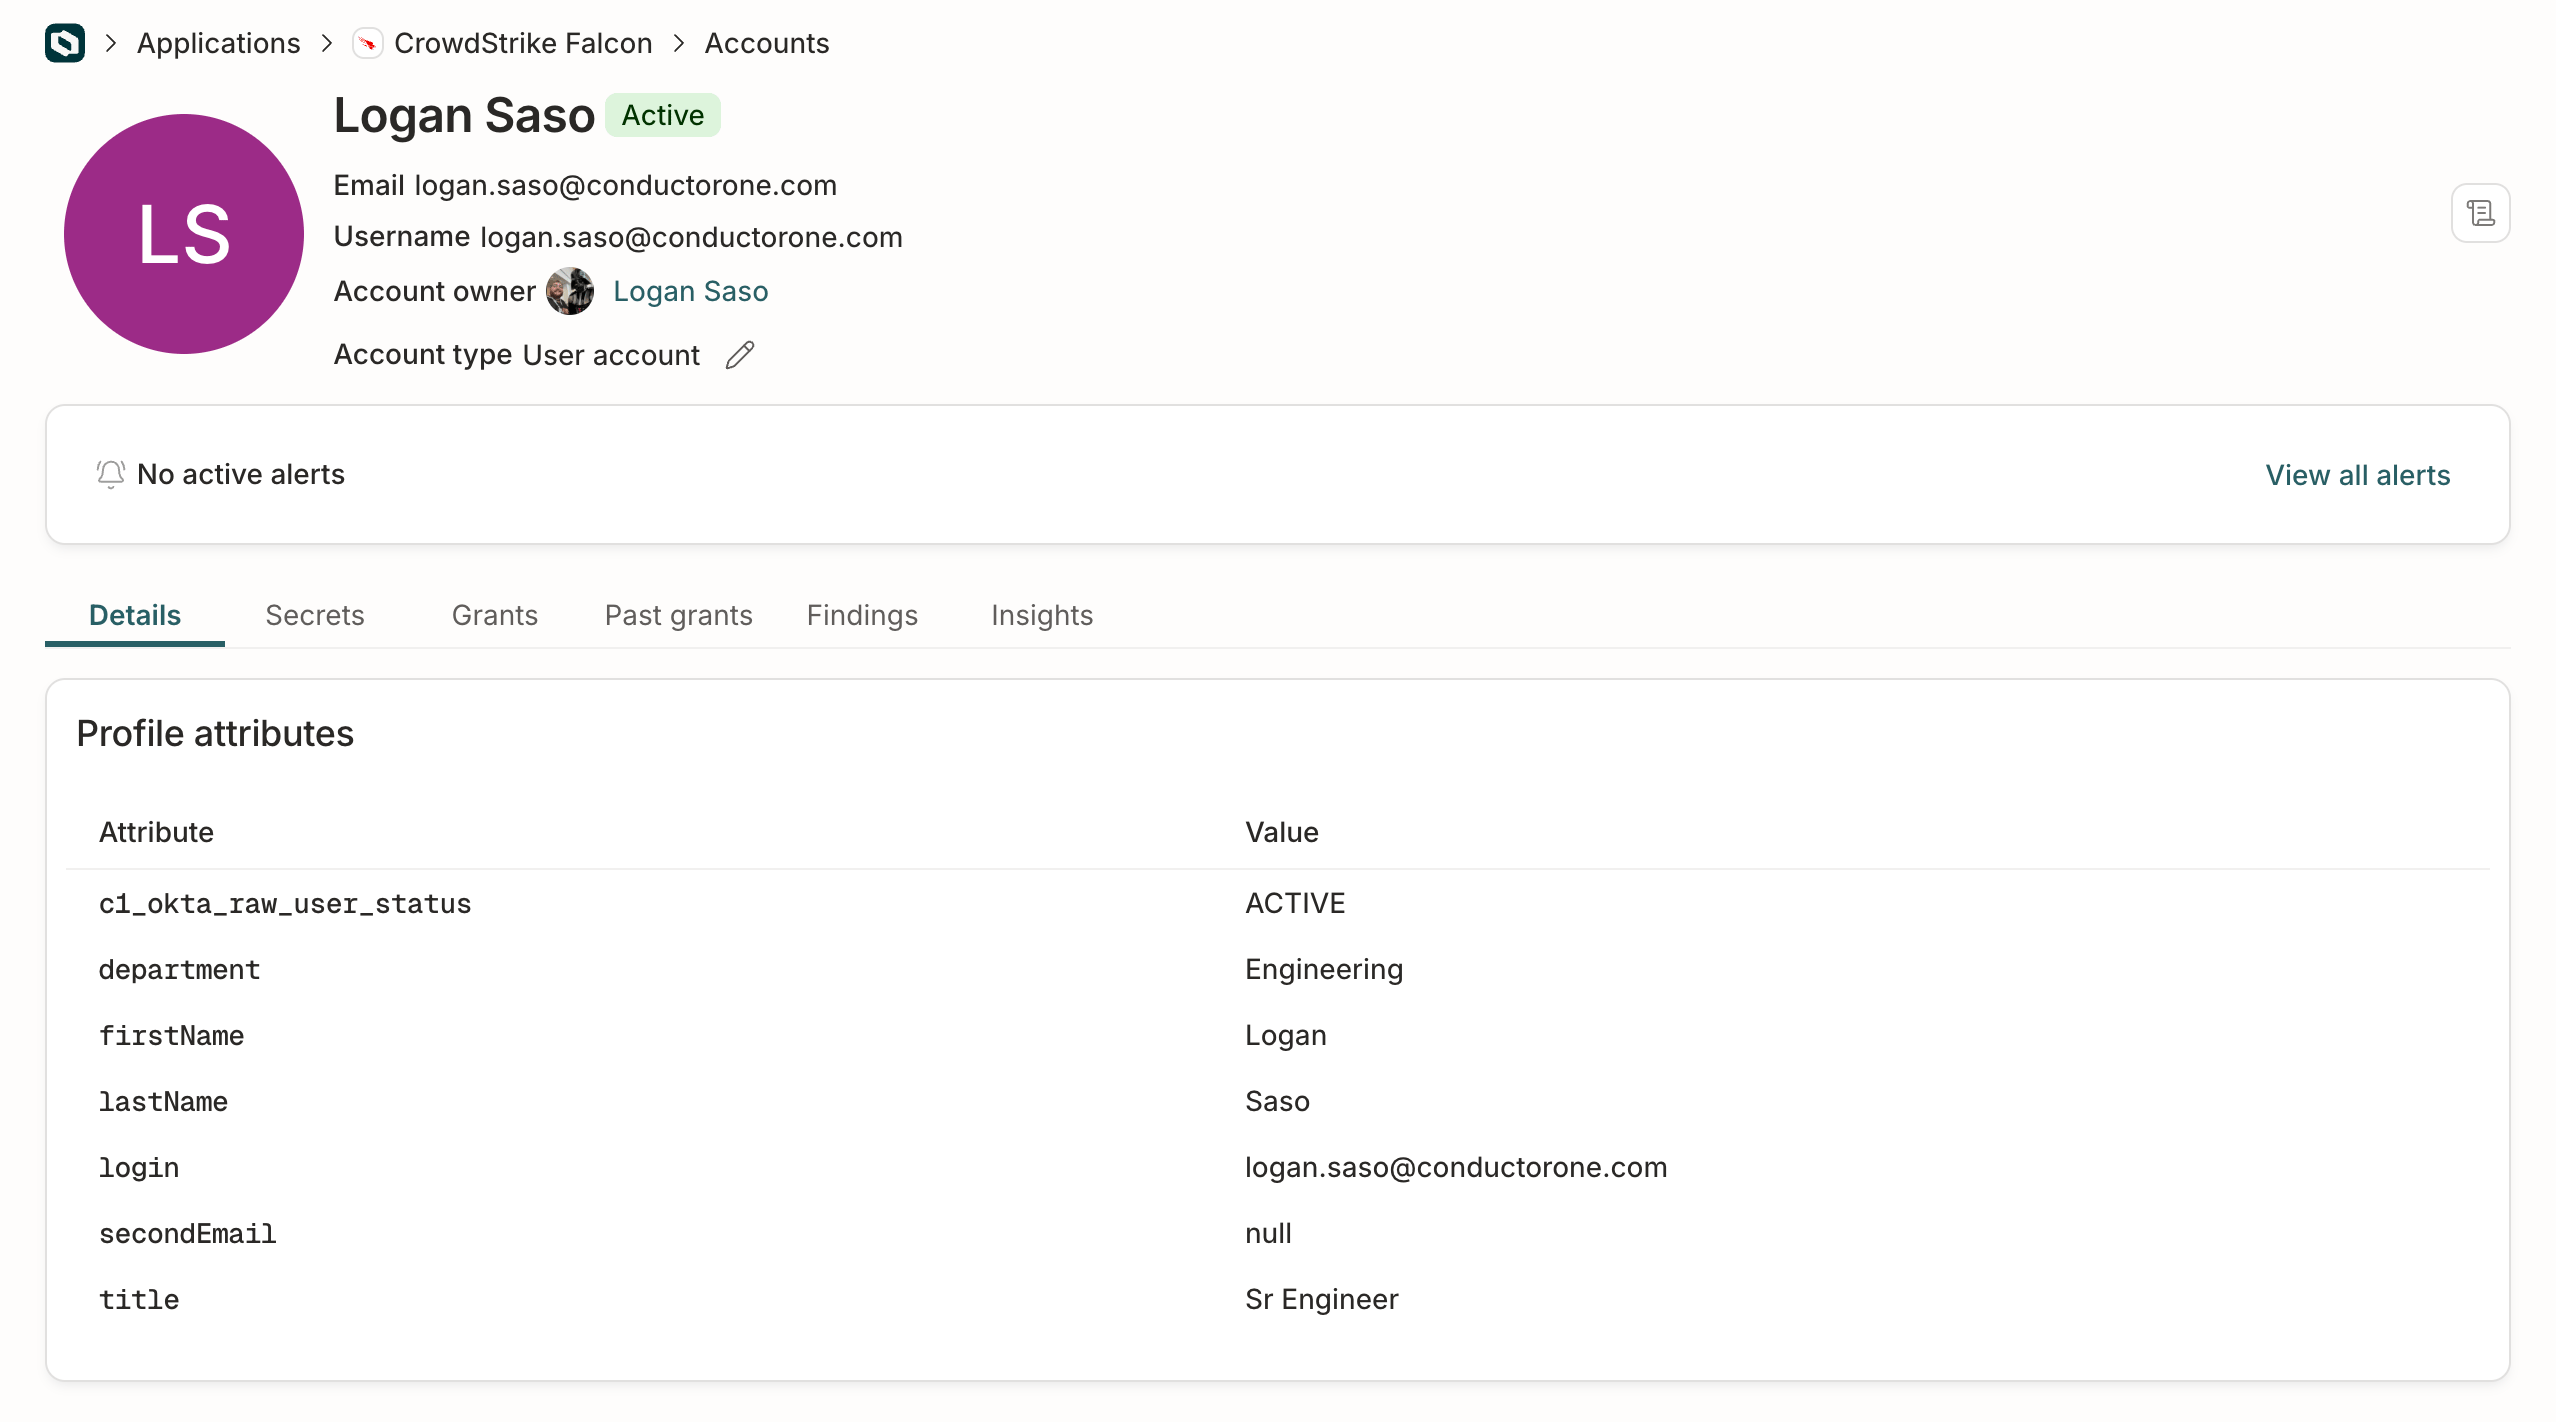
Click any account name on the Accounts tab to view that account’s details page. On this page you’ll find:- Details: The account’s profile attributes, automatically ingested from the source app via the connector.
- Secrets: Any secrets (such as API tokens) associated with the account
- Grants: The entitlements in this application that this account currently has access to
- Past grants: The entitlements in this application that this account formerly had access to
Manually revoke an account’s access to an entitlement
1
Navigate to the Apps page.
2
On the Managed apps tab, navigate to an entitlement:
1
Click the application’s name.
2
Click Entitlements.
3
Click the entitlement’s name.
3
Click Grants to view the accounts that currently have access to this entitlement.
4
To remove an account’s access to the entitlement, click Revoke. A Revoke access modal opens.
5
Enter your reason for revoking the access and click Revoke. The revoke task is created.